Requirements
- A text editor to edit php, it’s not necessary a professional editor, with NotePad or NotePad++ it’s ok
- A PC with XAMPP or other web server with PHP support installed, or access to a PHP web server
- Access to the phpMyAdmin
- Access to a MySQL data base
- Flash Contact Form Source Files
- Basic PHP knowledge
It’s a good idea have an order with the different folders, this will help us when our application grows. For this tutorial we gonna have a structure like this:
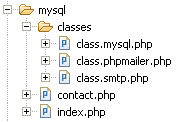
Fig.01-Structure
My main folder contains the index.php that holds the SWF file, the contact.php, that connect to the data base through the mysql class, save the data and send the email, and a folder called classes where I save all the classes used to save the data and send the email.
The MySQL class
We gonna work with our previous MySQL data base structure.
PHP5 brings some substantial improvements comparing to the PHP4 OOP implementation, so it’s easier to work OOP in PHP now.
So, basically our MySQL class have 3 parts:
- The constructor where we set the hostname, the username, the password and the database we gonna use
- The query function to make the quries to the data base
- Additional functions to work with the query, like return the number of rows, display the result as object, array or an associate matrix
Create the class
So, our first step is create the class. First we create a new empty document in Notepad++, and we call it class.mysql.php, and we save it on the classes folder. In our class.mysql.php file we could create the class:
class Mysql{And that’s it, we created our first php class, pretty easy right.
}
Define the variables
So, we have to declare the variables to connect to the data base, and we have:
- The Host, 99% of the time is localhost
- The mysql user name to connect to the mysql server and data base
- The user password to connect to the mysql server and data base
- The name of the data base
private $host; //the server host 90% of being localhost
private $user; //the username
private $password; //the password
private $db; //the database to select
The constructor
In our construct function, the one who initialize our class, we put the data about the server, the username, the password and the data base and set it to our previous variables
function __construct(){
$this->host = "localhost";
$this->user = "username";
$this->password = "password";
$this->db = "database";
}
The query function
So, by now we have set the necessary data to connect with the data base, now we create the query function that gonna lets us make queries to the data base.
With this function we gonna:
- Pass a query as a variable
- Connect to the MySQL server
- Connect to the data base
- Make a query
- return a result to insert datra or handle it later to display data
function query($sql_query){
//we try to connect to the mysql server
$link = @mysql_connect($this->host, $this->user, $this->password);
//if the connection failed, we stop the application and return an error
if(!$link) die("Could not connect to the MySQL server: " . @mysql_error());
//we try to connect with the database
$sel_db = @mysql_select_db($this->db, $link);
//if fail, we stop the application and return an error
if(!$sel_db) die("Could not connect to the data base: " . @mysql_error());
//if everything goes fine till here, we make the query
$query = @mysql_query($sql_query, $link);
//if the query fail, we return an error
if(!$query) die("Error: " . @mysql_error());
//we colse the mysql connection
@mysql_close($link);
//now we return the result
return $query;
}
The number of rows
A useful data when we work with databases it’s the number of rows. This number gives us the total number of results returned from a query, pretty useful for pagination and other stuff.
function numRows($result)
{
$num_rows = @mysql_num_rows($result);
return $num_rows;
}
Notice that we pass the result from a query, not a query.
The result as an object
We have different ways to retrieve the information, I’m gonna explain 3 basics, the first is have the result as an object:
function fetchObject($result)
{
$row = @mysql_fetch_object($result);
return $row;
}
and we retrieve the data as $row->field_name;
The result as an enumerated array
We could retrieve the data as an enumerated array too:
function fetchRow($result)
{
$row = @mysql_fetch_row($result);
return $row;
}
and we retrieve the data as $row[0], $row[1] and so on.
The result as an enumerated array and/or an associative array
function fetchArray($result)and we retrieve the data as $row['field_name'].
{
$row = @mysql_fetch_array($result);
return $row;
}
I really prefer the object approach, but the 3 are valid, and you have the 3 options, some prefer the Associative array approach other the Array approach, all depends on what make you feel more comfortable.
Test our class
So, if everything goes fine till now, we could make a little php file to test our class before program the html form. For this example we must have some data on our database, we could insert some test data from the phpmyadmin
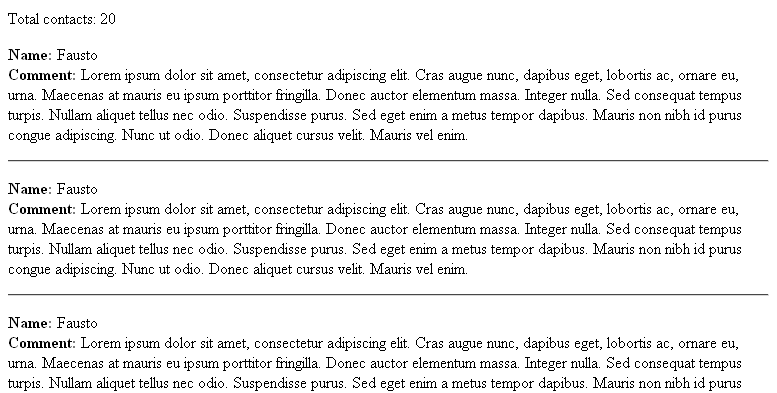
We create a test.php file and save it on our folder. We gonna make a query to retrieve all the data from our table contacts and show the name, and the comment of each row.
First we include our mysql class
//we include the mysql classNow we could use a while loop to print the data on screen
require_once('classes/class.mysql.php');
//we start the mysql class
$connection = new Mysql();
//make the query
$query = "SELECT * FROM contacts ORDER BY id ASC";
//pass the query to the new mysql class object
$result = $connection->query($query);
//retrieve the total items
$total_items = $connection->numRows($result);
//print the total number on screen
echo "Total contacts: ".$total_items;
while($row_contact = $connection->fetchAssoc($result)){
echo "
Name:".$row_contact['name']."
";
echo "Comment:".$row_contact['comment']."
"; echo "
If we point our browser to the test.php file we gonna have something like this
Implementing our class in the HTML contact form
With the contact form from our last tutorial, we make little changes to make it work with our new mysql class:
//include the mysql class and the phpmailer classIt looks the same, but with the difference that we implement our mysql class and the php mailer class to send the email.
require_once('classes/class.mysql.php');
require_once('classes/class.phpmailer.php');
if(isset($_POST['action']) && $_POST['action'] == 'submitform')
{
//new mysql object
$connection = new Mysql;
//recieve the variables
$name = $_POST['name'];
$email = $_POST['email'];
$url = $_POST['url'];
$comment = $_POST['comment'];
$ip = gethostbyname($_SERVER['REMOTE_ADDR']);
//save the data on the DB
$insert_query = sprintf("INSERT INTO contacts (name, email, url, comment, date, ip) VALUES (%s, %s, %s, %s, NOW(), %s)",
sanitize($name, "text"),
sanitize($email, "text"),
sanitize($url, "text"),
sanitize($comment, "text"),
sanitize($ip, "text"));
$result = $connection->query($insert_query);
if($result)
{
//send the email
$mail = new PHPMailer();
$mail->IsSMTP(); // telling the class to use SMTP
$mail->Host = "smtp.domain.com"; // SMTP server
$mail->From = "noreply@domain.com";
$mail->FromName = "Website";
$mail->Subject = "New contact from the website";
//message body
$body = "New contact
";
$body .= "Name: ".$name."
";
$body .= "Email: ".$email."
";
$body .= "Comment: ".$comment."
";
$body .= "IP: ".$ip."
";
$mail->MsgHTML($body);
$mail->AddAddress("your@email.com", "your name");
if(!$mail->Send()) {
echo "An error has occurred";
} else {
echo "Your message has been sent";
}
}
}
The Flash contact form
Now, we could make our flash form. For this we gonna use URLRequest, URLVariables and URLLoader to send the data via post.
So we start making 4 input fields called:
- name_txt
- email_txt
- website_txt
- comment_txt
So, now we could set everything on flash to send our comments and stored on our data base.
import flash.events.Event;And in our php file contact.php it’s the same as contact_form.php but without the html header and the form:
import flash.net.*;
stop();
var contact_url:String = "contact.php"; //the name of our php file to contact the data base
var contactRequest:URLRequest = new URLRequest(contact_url);
var contactLoader:URLLoader = new URLLoader();
var contactVariables:URLVariables = new URLVariables();
send_btn.addEventListener(MouseEvent.CLICK, sendForm);
function sendForm(evt:MouseEvent):void
{
// add the variables to our URLVariables
contactVariables.action = "submitform";
contactVariables.name = name_txt.text;
contactVariables.email = email_txt.text;
contactVariables.url = website_txt.text;
contactVariables.comment = comment_txt.text;
// send data via post
contactRequest.method = URLRequestMethod.POST;
contactRequest.data = contactVariables;
// add listener
contactLoader.addEventListener(Event.COMPLETE, onLoaded);
contactLoader.addEventListener(IOErrorEvent.IO_ERR OR, ioErrorHandler);
//send data
contactLoader.load(contactRequest);
//show sending message
trace("sending");
}
function onLoaded(evt:Event):void
{
var result_data:String = String(contactLoader.data);
if (result_data == "ok")
{
trace("sended");
}
else if (result_data == "error")
{
trace("error");
}
}
function ioErrorHandler(event:IOErrorEvent):void
{
trace("ioErrorHandler: " + event);
}
require_once('classes/class.mysql.php');Before test it, don’t forget to change the data used in the phpmailer so you could ber able to send email. For more information on the phpmailer, don’t forget to read the examples and tutorials
require_once('classes/class.phpmailer.php');
if(isset($_POST['action']) && $_POST['action'] == 'submitform')
{
//new mysql
$connection = new Mysql;
//recieve the variables
$name = $_POST['name'];
$email = $_POST['email'];
$url = $_POST['url'];
$comment = $_POST['comment'];
$ip = gethostbyname($_SERVER['REMOTE_ADDR']);
//save the data on the DB
$insert_query = sprintf("INSERT INTO contacts (name, email, url, comment, date, ip) VALUES (%s, %s, %s, %s, NOW(), %s)",
sanitize($name, "text"),
sanitize($email, "text"),
sanitize($url, "text"),
sanitize($comment, "text"),
sanitize($ip, "text"));
$result = $connection->query($insert_query);
if($result)
{
//send the email
$mail = new PHPMailer();
$mail->IsSMTP(); // telling the class to use SMTP
$mail->Host = "smtp.domain.com"; // SMTP server
$mail->From = "noreply@domain.com";
$mail->FromName = "Website";
$mail->Subject = "New contact from the website";
//message body
$body = "New contact
";
$body .= "Name: ".$name."
";
$body .= "Email: ".$email."
";
$body .= "Comment: ".$comment."
";
$body .= "IP: ".$ip."
";
$mail->MsgHTML($body);
$mail->AddAddress("your@email.com", "your name");
if(!$mail->Send()) {
echo "error";
} else {
echo "ok";
}
}
}
function sanitize($value, $type)
{
$value = (!get_magic_quotes_gpc()) ? addslashes($value) : $value;
switch ($type) {
case "text":
$value = ($value != "") ? "'" . $value . "'" : "NULL";
break;
case "long":
case "int":
$value = ($value != "") ? intval($value) : "NULL";
break;
case "double":
$value = ($value != "") ? "'" . doubleval($value) . "'" : "NULL";
break;
case "date":
$value = ($value != "") ? "'" . $value . "'" : "NULL";
break;
}
return $value;
}
You could test your php code without flash using the same form in an html file and making the action=”contact.php”, so you could debug it.
No comments:
Post a Comment